Tuesday, April 22, 2014

Favorite {Read-Aloud} Novels: Part 1

If I was forced to pick my absolute favorite part of my day, I would say READ-ALOUD, hands down. I love everything about this time with my kiddos: relaxing, unwinding, quiet, all while enjoying a book together. I read aloud to my students every single day, at the same time each day, for about 20 minutes. More on a good day, never less. It is SO important to make time for reading aloud, but that's info for another post. ;)

It's nearly impossible for me to pick favorites when it comes to books {seeing as how I own approx. 11,657 of them}, but there are some novels that have really become tried & true favorites over the past 2 years. Last year, I taught third grade for part of the year and was able to try out a lot of fun novels with my class. This year, I was in fourth grade and chose to use a few of the same books, as well as trying out a few new ones.

This list contains {SOME} of my all time favorite read aloud novels. So, here we go!

1. The first book on my list of favorites has got to be "The BFG" by Roald Dahl. I mean, I even named my puppy Sophie after the little girl in the book. I love that this book is overflowing with humor that really gets the kids laughing, but also the fact that it is written with such vivid detail and imagination. Unfortunately, more and more kids are losing their sense of imagination and are unable to play unless they have concrete items. Sadness. This book really sparks the imagination with the description and outlandish characters. It's definitely my ultimate tried and true fav. I will even admit that I was not a Roald Dahl fan when I was younger. I didn't dislike him, I just never chose to read his books. 
{TIP: Make sure you have a lot of water/hot tea on hand when reading this book. You MUST perfect your giant voice and have a variety for the times the other giants speak. It's critical. My kids from last year still ask me to "say things in my BFG voice." All about the entertainment here.}
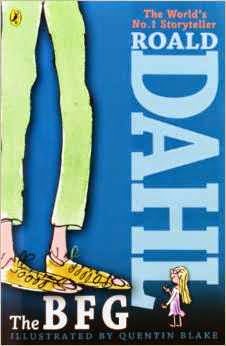

You can find "The BFG" here!
After reading "The BFG", we make frobscottle and snozzcumbers. If you don't know what those two words mean, you are simply missing out. I've used this frobscottle recipe with my kids and they love it. I always send home the recipe too, so they can try recreating it again and again! There are many snozzcumber recipes online, all of which I knew my kids would not eat. I just bring in cucumbers and dip and we call it a day. We always have a "BFG Celebration" after reading and even watch "The BFG" movie {it's not good, at all. GREAT win for teachers to show the book is usually better than the movie ;)}

And, as if I haven't proven enough already that this is simply a fantastic read-aloud, I gave my kids a copy of "The BFG" as one of their Christmas presents this year {$1 on Scholastic + bonus points = for free!} and they absolutely went crazy. You would've thought I gave them a check for $1,000,000. Seriously. It was adorable. I also made a cute little bookmark with a Roald Dahl quote on it for them to use in their book. This was a really special gift and I plan on giving something similar each year.
2. Now, I'm not sure if anything can really top my opinion of "The BFG" {clearly} so we will stick with the Roald Dahl theme for a minute. My next read-aloud novel pick is "Matilda" by, you guessed it, Roald Dahl.
"Matilda" is a classic and well-loved by my young readers! This was a favorite book of mine as a kid and I love sharing the excitement of this book with my kids. 
{TIP: Make sure you channel your inner Jersey girl, Fran Drescher, nasally voice for the mom. It makes all the difference.}
As with "The BFG", I always show the movie version of "Matilda" and let the kids decide which they like better. I was actually surprised that a lot of the kids like the book better because the movie cut a lot of parts from the book. 
{Teacher win, yay!}

3. My next favorite read-aloud novel would have to be "The Lion, the Witch, and the Wardrobe" by C.S. Lewis. Although this is technically the second book in the "Chronicles of Narnia" series, I like to jump right into this book because it is one of my favorites. 
This is an EXCELLENT book and crowd favorite because of the action, humor, and plot twists & turns. Although this book requires multiple voices {all of which should be somewhat British} it is a really fun book to read aloud and the kids always enjoy it. This is the third, and final, book in my list that has a movie accompaniment that I show following our book. 
Keep in mind, this movie is fairly long, we split this up over a couple of "Fun Friday" lunches in the classroom. 

4. My next choice for {Part 1} of my fav read-aloud novels is "Wonder" by R.J. Palacio.
I don't even truly know where to begin praising this novel.
Every once in awhile you read a book that is life changing. This is that book.
This is one of those books that you read, cannot put down, and cannot stop thinking about once you've finished reading. The message sticks with you.

I have not read "Wonder" as a read aloud yet, it's another one I recently read to check out what the rage was about, but I definitely plan on reading it next year. It's an excellent book to get kids talking about empathy, sympathy, compassion, and acceptance. The book is extremely well-written and has received a full 5 stars on Amazon, from over 3,000 readers. 


5. My final choice is another that I haven't actually used in my classroom yet, but definitely look forward to using next year. I recently read this book myself {as it has gotten a TON of praise from various teachers/teaching blogs} and fell head over heels in love.
The book is "The One and Only Ivan" by Katherine Applegate. It is the story of a captive gorilla in a shopping mall zoo, told from his point of view. It will warm your heart and break it all at the same time. Promise. It's beautiful. I love it. I want to go read it again right now.
You can find "The One and Only Ivan" here!

I think this book will be an excellent choice as a read-aloud and look forward to choosing it as one of my first books for next year!

Although I cannot possibly choose all of my favorites {it would seriously take me until three Sundays from now}, these are a few that have a special place in my heart, for one reason or another.
I hope you check them out and find that you love them as much as I do!
I find that when I read a book I'm truly passionate about, my kiddos soak it up and look forward to hearing me read aloud each day.

Have any favorite read-aloud novels you think I should know about?
Comment below and let me know! :)
I'm constantly searching for books to fall in love with.

Happy Reading!

~Kristen


Saturday, April 19, 2014

Must-Make Dish: Summer Chicken Salad

As the weather starts to {FINALLY} warm up here in Western New York, I have started craving summer foods!

I had been scouring Pinterest for new summer recipes and came across a recipe for Summer Chicken Salad. I really like chicken salad, but don't always love the number of calories that can sometimes come with this delicious dish.

That is when I came across The Pioneer Woman's Summer Chicken Salad. I have actually just recently become a fan of The Pioneer Woman. I really like some of the meals she makes, but find that I need to adapt most of them to be a little lower in calories/fat/sugar.

I thought this would be the PERFECT recipe for a girls' night with my mom and sister to accompany our wedding planning. {My baby sis is getting married next summer, YAY!}

Please excuse the lack of step-by-step photos {FAIL}. I had been up for 6.5 hours the night before with Sophie, as she cried all. night. long. after her spay surgery. Poor baby. Therefore, due to pure exhaustion, I threw this thing together {sans} photos. My bad.


Summer Chicken Salad

*The following ingredient list/step-by-step directions are how I chose to adapt The Pioneer Woman's recipe. For her exact instructions/ingredients, please follow the link to her recipe.

Ingredients:
  • 3 boneless, skinless chicken breasts {grilled} *Season with salt & pepper.
  • 3 ears fresh corn on the cob {grilled}
  • 3 tablespoons minced, fresh dill
  • 2 stalks celery, finely diced
  • 1 medium red onion, finely diced *I recommend using a little less, if you aren't a huge onion fan.
  • 1 cup blueberries
  • Romaine lettuce leaves
For the dressing:
  • 3/4 cup feta cheese *I used reduced-fat.
  • 1/4 cup parmesan cheese
  • 1/4 cup half-and-half
  • 1/4 cup light mayonnaise
  • 1/4 cup light sour cream
  • 1 teaspoon sugar
  • Juice of 1 lemon
  • Salt & pepper, to taste
Directions:
  1. Season chicken breasts with salt and pepper on both sides. Grill chicken until cooked through.
  2. Grill corn on the cob, with husks on. My husband followed Bobby Flay's Perfectly Grilled Corn on the Cob Recipe, as it was our first time trying this.
  3. Once corn is cool enough to handle, slice kernels off of the cob and place into a large bowl.
  4. Dice up red onion, celery, and dill, then add to your bowl. 
  5. Once chicken has cooled, slice into bite-size pieces. I sliced my chicken first, then shredded it slightly using two forks.
  6. In a separate bowl, combine all of your dressing ingredients together.
  7. Pour dressing over ingredients and combine well, folding everything in. 
  8. Toss in blueberries and lightly coat with dressing and other ingredients.
  9. Serve on romaine lettuce leaves. *Can also be served as a sandwich, or on crackers.
*Next time, I plan on using Greek yogurt as a substitute for some of the ingredients in the dressing {sour cream, mayo, & half-and-half}.

Everyone really enjoyed this {lighter} Summer Chicken Salad. 
It would be perfect for a baby or bridal shower, picnic, or even as a side dish at a cook-out.

Happy Cooking!
- Kristen


Saturday, April 12, 2014

RIP Overused Words!

As the end of the school year quickly approaches {so crazy!}, I find myself reflecting back on some of my favorite activities and lessons I tried out with my fourth graders this year.

In my classroom, I use a combination of Daily 5, CAFE {adapted to CRAFT}, and 6+1 for guided reading and writing instruction. I love using all of these different 'methods' and 'techniques' in my classroom, but every once in awhile I add-in a couple of random CRAFTIVITIES, as I like to call them, to get my kiddos practicing a skill that they seem to be lacking, as a whole.

One of the things my kids all REALLY needed to work on was spicing up their writing! I do a couple of mini-lessons with my kids on Word Choice called: Spaghetti & Meatball Words.
They. Love. This. 
Basically, I tell my kids that every piece of writing they do will be full of spaghetti words, the words that really hold everything together and give the reader the information they are looking for. BUT, every piece of writing should also have a few 'Spicy Meatball Words' {side note: you MUST say 'Spicy Meatball Words' in your best Italian chef accent, every single time you say it, or this just will not be effective. Seriously. Do it. They eat it up... see what I did there?! ;)} Anyways, THEY LOVE THIS!

As much as they LOVE adding in their meatball words, some of them still struggle with SUCH boring spaghetti words. It can be painful to read some of their writing because it is so mundane. One thing I really stressed this year was the use of the thesaurus. I taught my kids how to use an 'old-fashioned' thesaurus, as well as the tool on Microsoft Word, and online. Once my kiddos were equipped with the tools needed to find more interesting words, things were improving.

One 'craftivity' we completed together was RIP Overused Words! I split my kiddos into groups and had them come up with a list of words {based on their own writing in their writer's notebooks} that they thought they all really overused. Once everyone had a list, we gathered back together whole-group and decided on our top 5 words we were NEVER TO USE AGAIN in our writing!
*Some of the groups had words like "and", "but", etc. We talked about how these words are kind of the glue throughout our writing, but we acknowledged the fact they are used often. 

Once every group was assigned one of our 5 overused words, they set off to find a new list of words that we could replace their 'chosen word' with! They were able to use the 'old-fashioned' thesaurus, as well as any online options. We then added our new word lists below our "NEVER TO BE USED AGAIN" words onto our tombstones. 

The kiddos are able to use these as a tool for their writing, to make sure they are getting rid of some of those boring, overused words, and replacing them with some SPICY MEATBALL WORDS! {said in Italian chef accent, I'm telling you, it's a must.}

Our Overused Words Cemetery! 


This is an activity I will definitely use year after year in combination with my other Word Choice mini-lessons. Anything that gets the kids crafting is always fun, in my opinion! 
Who says crafting is only for art class anyways?! 
This could definitely be adapted for other grade levels as well! :)

Happy Crafting!
~Kristen


Thursday, April 10, 2014

Getting Organized: Martha Stewart Discbound Planner & Other Ramblings About Lesson Plan Books

One of the biggest compliments I am constantly receiving, both in my personal life and professional life {as a teacher}, is how organized I am. I believe that organization is something you're either born with, or NOT. For example, my husband is a clean person in the sense that he understands his dirty clothes go in the laundry basket and he needs to hang up his towel after a shower, but if it were up to him to clean the house he would go around making piles and stacks everywhere and call it a day. Ummm, that's not cleaning?!

One way that I am able to stay on top of: teaching, grad school, home projects, my puppy, my husband's travel/appts., personal tasks/appts, ... MY LIFE is through the use of a planner. I have been using a planner since I can remember {didn't we get them in like 3rd grade?!} and cannot imagine not having one. That being said, I am extremely particular when it comes to picking out a planner. Like, stand in the aisle of Staples, Target, Walmart, Office Max, & Office Depot for 30-45 mins each before deciding to just go back to Staples for the original planner I had in my hand.

For me, a planner is more than a place to jot down things to accomplish for the day or homework assignments, it's a way for me to visualize where I need to be, when I need to be there, and everything I need to get done in between.

I really have a set 'criteria' of what a planner must include for me to be able to love it:

  1. Plenty of room to write - I have larger-than-normal 'teacher' handwriting, girlfriend needs some space.
  2. Sections - I need to be able to separate out the different parts of my life, instead of making one big clustered mess in one section. Not okay.
  3. CUTENESS - If I'm actually going to use this thing each and every day, it's gotta be something I'm going to want to look at.
  4. Size - I like to be able to toss my planner in and out of my teaching bag, grad school backpack, home desk, etc. without it taking up a lot of space.
  5. Functionality - Basically, will it work for my needs? 
If a planner meets all of these requirements {wow, I think I have SERIOUS issues after writing these requirements out} then it is ALL MINE! 

The problem is, there are very few planners that actually meet all of these requirements. Therefore, I started looking into creating my own. I first came up with the idea of creating my own planner when I was prepping for my fourth grade classroom this past summer. I couldn't find a single lesson plan book I actually liked, or that fit our somewhat unique schedule, so, I made my own. {Side note: Did you know Staples will spiral-bind something for you for about $6?! SCORE!} I simply created the template for my lesson plans, printed my school schedule/class schedule, a cute cover/back {laminated}, and printed everything off double-sided. I walked into Staples and was able to pick up my plan book spiral-bound {of course, I had to get the binding to match my cover ;)} in about 15 minutes while I shopped for other supplies! WIN!

I used this inspiration for my "everything else planner". The only things that do not get written into this planner are my teaching plans/grades for my students. Those belong in separate plan books/grade books. After browsing YouTube, Pinterest, and other blogs, I decided to go ahead and purchase a Discbound planner. People really LOVE these on the web, so I figured it wouldn't hurt to give it a try! 

Staples has their own line of Discbound Planners: ARC Brand. I originally purchased an ARC planner, but ended up exchanging it for one from the Martha Stewart Line at Staples in 'blue' size: 6 1/2 x 9". I am a HUGE fan of mint, and loved the classy look of this planner. The ARC System has some brighter colors available, for those of you who prefer those.
Martha Stewart Discbound Planner, Blue, 6-1/2x9"
The reason I decided on the Discbound Planner was mainly due to the flexibility this type of planner offers. I liked having the option to add/remove pages and sections as I felt necessary.


 The next item I purchased to help with my "Ultimate Planner" creation was the Arc System Desktop Punch. I read a ton of reviews about personalizing the discbound planner, and everyone concluded that it was vital to have this punch to be able to truly make your planner your own. The punch has special "mushroom shape" punches that are required to make the pages fit in your discbound. This is not like a typical binder where you can unclip and clip pages inside. So far, I have LOVED this purchase and do not think you should bother with a Discbound planner unless you are going to get the punch. This is the only way to truly customize the planner to fit your needs.

A few other accessories I picked up from Staples were some Martha Stewart Discbound Dividers. I only picked up 1 pack {for now}, but always have the option of adding additional dividers as I need them. I also purchased Post-It Tabs to use as labels for my dividers. I simply sliced off the top portion of the Tab {where the color is}, lined up the write-able portion of the tab with the length of the divider tab & cut, labeled the divider, & voila! Technically, you can write on the Martha Stewart dividers, but I didn't like how that looked. I suppose if you had a handy label maker, you could use that as well!  


Ta-Da!
*The tape you see near my pen is the rest of the Post-it Tab that I left on to ensure 'stickiness' of the tabs. This is hidden once the pages are flipped over onto the divider.

Here she is! You will also notice that my discs are now PINK! The ARC System sells a variety of discs in different colors and sizes. I grabbed the 1" discs, which hold 150 sheets, so that I could expand the inside of my planner.

The sections I created in my planner are: 
"Planning" - Basic calendars & weekly schedules used for appointments, meetings, date nights, plans with friends or family, etc.
"Projects" - This is an ongoing list section of my planner where I can jot down project ideas I come across that I want to create for home decor or for home updates. For example, we are currently in the process of fencing in our backyard. I am using this section to jot down contractors, phone numbers, estimates, etc.
"Meals" - One way I stay organized in my home {as I am often NOT home}, is by planning ahead. I have been meal planning for a couple of years now {since my husband and I started living together} and have found it to be an efficient way to somewhat keep me on track at Wegmans as I know exactly what I need to purchase. I also post our weekly menu on a calendar on our fridge so I don't have to listen to my husband constantly asking me, "what's for dinner?!" 
"Blogging" - As a NEW blogger, {yay!}, I use this section to keep track of post ideas, dates I want to post on, different social media forms I've posted on, etc.
"Notes" - This is just a section in the back of my planner with blank lined paper to jot down any miscellaneous notes.


In the front of my planner, I have an apple-shaped Post-It pad {teacherprobs}, as well as Arc System Page Flags that come on a semi-transparent plastic piece that clips onto the discs. 
I LOVE THIS THING! 
It is so much easier than shoving a bunch of random Post-it pads {that magically disappear} all over the bottom of my teaching bag. I also have a couple of Poly-Zip Pockets to store other odds & ends such as pens/pencils etc. I'm not sure if I love these or not, as I feel like they make the planner a bit difficult to close and sort of cumbersome, but I held onto them just incase. 

These are the pages that come with the Discbound Planner. They are just simple lined pages that I kept in the "Projects" & "Notes" section of my planner.

 The rest of the pages, as well as the standard discs, are tucked away in my "Planner Bin" with all of my additional accessories. I will use this to add more paper as I start to need it refilled in my planner.

Here is a glimpse at my "Planning" section. I have a calendar for each month, 
purchased on Etsy from Kate & Trudy: Monthly & Weekly Calendar, followed by the weekly pages for that month.
*Note: Super cute Scotch Expressions Washi Tape, on sale at Staples for $2 a roll! 
I used my floral print to mark off Spring Break next week, yahoo! :)

I also included a colorful calendar for the front of my planner, just to be able to see different dates at a glance throughout the whole year. Again, my planner is not standard paper-size, so everything needed to be scaled down when I printed. I basically just created text boxes on Microsoft Word to the size of my planner pages and inserted what I wanted to print. I'm sure there are much easier ways, but my printer is not the most user-friendly & this was the best way for me so that I did not throw it out the window. :)

I {am in the process of} adding little tabs to each monthly calendar I have in my planner, downloaded from Miss Tiina. My calendars start with April, since I just purchased my planner system. Next year, I will include all of the months and will add the other tabs onto those calendars. 

In my "Blogging" section I have a blogging printable I created to help keep track of my ideas, date posted, and different social media outlets I want to post on. I printed these DB-sided in my planner, and can always remove them as they are posted, or keep them in there to look back on.

In my "Meals" section, I created a meal planning printable to keep track of the meals we are having each week. This is a quick way for me to glance at what we are having and create a grocery list based off of that. 

Have you come across a planner you just absolutely love?! I'd love to hear about it! For now, I really enjoy this new planner system! I will post another update as I add further sections to my planner. :) 

Also, THANK YOU to all of my readers! It has been such an exciting start to begin this journey blogging, and I cannot believe I've had almost 800 views on just 7 posts! :) I've really loved sharing the different project ideas, teaching thoughts, and organizational tips that I come across and "CRAFT" every day! :)

Happy Crafting!
- Kristen


Tuesday, April 8, 2014

Favorite Fonts: Part 1

Comic Sans, Kristen ITC, and Lucida Handwriting are enough to put me RIGHT OVER THE EDGE. I have had a {slight} obsession with fonts since I started student teaching many moons ago. I love how something so simple can instantly be made cute & fun to look at, just by changing the font.

During student teaching, I actually had to help multiple teachers download fonts onto their computers because they loved how everything looked with the different fonts I used! To this day, I am still constantly helping people at school upload different fonts to their computer. I guess it just seems so simple and easy to me, but I forget not everyone knows about the many ways you can access FREE fonts!

The two places I collect fonts from most often are Da Font and Teachers Pay Teachers. I have never paid for a font & have HUNDREDS on my computer. There are so many to choose from! My personal computer is a Mac so there are slightly different instructions on how to install fonts {I personally find it easier than PC}, but I have also downloaded a ton of fonts onto my PC work laptop, as well. Da Font provides instructions on their FAQ page on how to download and install fonts.

Since I have SO many fonts on my computer, it can sometimes be extremely time-consuming for me to create ANYTHING because I have so many fonts to test out and look at. Because of this, I created a 'font cheat sheet' for myself with some basic "everyday" fonts that I use the most. My favorite "categories" or "creators" of fonts are the 'Hello collection' found on TPT, any fonts by Kimberly Geswein on Da Font, and CK fonts, along with many more.

Below is my "Font Cheat Sheet" for my most basic fonts that I use on forms, worksheets, notes home, newsletters, projects, etc. I generally use some of my 'funkier fonts' for headings, bulletin boards, etc. I will try to link up as many of the fonts as I can at the bottom of this post, but feel free to just Google the name of the font if you do not see a link below. Stay tuned for more of my "Favorite Fonts" in future posts! :)
Remember, even a few font downloads can make ALL the difference in the appearance of your creations!

Font cheat sheet! 
This is smiley monster.
This is ABC Teacher.
This is Amber’s Cuteness.
This is DJ Doodlers.
This is FGS Cherry on Top.
This is FGS French Vanilla.
This is FGS Frozen Yogurt.
This is Hello Ali.
This is Hello Doodle Print.
This is Hello Dot Stick.
This is Janda Manatee Bubble.
This is KG Lego House.
This is KG Part of Me.
This is KG Primary Penmanship.
This is KG Primary Penmanship Lined.

This is KG Second Chances Sketch.
This is KG The Fighter.
This is KG What the Teacher Wants.
This is LL Elementary Dots.
This is Love Ya Like a Sister.
This is LPs Princess Print.
This is Primer Print.
This is Rowdy Writing.
This is the Basic Apple.
This is Tinker Toy.
This is LD Elementary.
This is LD Delightful.
This is CK Jot.
This is CK Handprint. 

**Mobile users may not be able to see the Font Cheat Sheet as shown above. Check out the screenshots below for a better idea of what each font looks like!


Font Resources:
Smiley Monster Font
ABC Teacher Font
Amber's Cuteness Font
DJ Doodlers Font
FGS Fonts
Hello Fonts
Janda Manatee Font
KG Fonts {My favorite!}
LL Fonts
Love Ya Like a Sister Font
Primer Print Font {One of my favs for worksheets/notes home}
Rowdy Fonts
Tinker Toy Font
CK Fonts

Monday, March 31, 2014

DIY Custom Desk {Reveal}

It's funny how some things in our home just become standard, no matter how much we may despise them ... off the top of my head I can think of several little annoyances I first had about our home that I don't even see anymore. One thing is a scuff on the trim at the top of the stairs. It is only about a 1x1" square smudge that has been there since we moved in, but it drives me insane. Why haven't I just painted over it in about 30 seconds? Well, it's just one of those things I have yet to get to.

One thing I knew I NEEDED to fix {mostly because I was about to go absolutely insane and throw it out the office window} was my desk situation. As a teacher, grad student, crafter/DIYer, and now, I guess, blogger, I really needed a more functional workspace to be able to complete all of the projects that I CONSTANTLY have going on.

I knew that I wanted a desk that was going to be larger than normal with much more room than just a few drawers, as is standard in a typical desk. I also knew I wanted to have some space for my makeup area {just a little mirror and a basket of makeup} because I cannot, for the life of me, stand and do my makeup in the bathroom. I don't know why, but I just can't do it.

So, before we get into the steps on how I tackled this custom-built desk that I absolutely ADORE, lets take a look at the gem I have been using as a desk for the past TWELVE YEARS. TWELVE.

Yep, true story. This is the desk I've had since I was 12 years old. It came as a part of a BUNK BED SET I had in my bedroom. As you can see from the beautiful chipped paint, I had painted the desk bright purple at one point {great choice?} and then covered that up with black paint, which all eventually began to chip throughout the many moves that it was slammed into U-haul truck walls and the like. 

{Just FYI}: Over the past 12 years this desk has moved from Michigan to New York, from New York to Ohio, from my childhood home to my college apartment, from my college apartment to my grown-up apartment, all the way to our first home. It's been around the block, AND BACK. Needless to say, not only was this thing a complete eyesore, it was not functional for my needs in the slightest. At 12 years old, this was plenty of space for a couple "Teen People" magazines and some lipgloss, but girlfriend has some more serious needs for a desk at this stage in the game.

I found the PERFECT desk for the office based on what I thought I really would need {and use} for storage and organization purposes. The only problem was, the desk I had my eye on was $1200 ... not exactly the kind of money I was planning on spending on a desk, like, ever. {See desk here: Pottery Barn Project Table Desk}

Using this desk as inspiration, I knew we could tackle a DIY desk for WAY less cost, while still achieving the same amount of space and storage.

We started off by purchasing {2} Closetmaid Shelf Organizers. 
I purchased mine at Target for approx. $34/organizer, using a coupon off of the Cartwheel App.

Next, I assembled the shelves. We were expecting these to be a much more daunting task, but we were pleasantly surprised at how little effort they took to complete. At this point, I started playing around with how far apart I wanted the bases of the desk to be. 
Keep in mind, these shelves are about 3' tall, meaning this is one mega-desk.

The next step was to decide how we wanted to create the top of our table. I knew I wanted a dark top with a white base {similar to our dining room table}, but I wasn't sure which type of wood was going to work best or be most cost-effective. I love the Minwax stain: Dark Walnut {I feel like I use it for everything}, and figured I would just use that for the top since we already have a can in the garage.

Now, please keep in mind that while I try really hard at DIY projects, and typically get them to come out pretty great, I do have epic fails at least 1x during the project, where I later ask myself, "REALLY? What was I thinking?!" This was one of those moments.
After spending approx. 45 minutes on the floor of Lowes' lumberyard, arranging and re-arranging different types of wood/widths, etc, we collected the pieces we were going to use. We decided on the wood we wanted to make our top and started to leave the store {finally}. 

As we were hauling the lumber around Lowe's, we spotted some espresso-colored shelves in the home organization aisle. After examining them, we decided they would make the PERFECT top to our desk, if only they would be the right measurements. What are the chances that they added up to the exact length and width that we wanted for our desk top? {With us, that would be a 0% chance, on a good day}. So, again, we sprawled across the floor, laying out our boards to see how it would look. We loved it and decided to go this route. These boards were already stained & finished {their real purpose is to be used as shelving in a closet}, and were cheaper than the lumber we were originally going to use. SCORE! 

We got home and started putting the desk together! We worked from the front of the desk towards the back, which ended up being a great plan. There is a slight discrepancy of maybe 1/4" towards the back of the desk, but the only reason you would know is because I just told you. :)

 I LOVE the way the desk turned out! I have so much space to fill with my grad books, crafting supplies, school supplies, etc. As you can {sort of} see, I found a TON of super cute baskets in gray, white, and black in the Target Dollar Spot for $1 each to use in the cubes.

Sophie loves hanging out near her mommy's new desk! 
{Ps. ignore the overflowing garbage, full of wrappers from this project. Photos were taken as soon as we finished. I couldn't wait!}

Final cost breakdown for this custom 6x3' desk:
- {2} Closetmaid Shelving Units - 9 cubes: $34.00/piece, $68.00
(with the use of a Cartwheel App coupon, normally $39.99 at Target)
- {3} Blue Maid Shelves in Espresso: $11.48/shelf, $34.44
- {1} Package of 1" screws to attach top of desk to the base: $5.00

Total cost: $107.44
*I will need to get a bar-stool height chair for this desk, which will be an additional cost, my chair is now too short, as you can see in the photos. I plan on getting a fun-patterned stool with a back from Target's Threshold line. I just have to decide which one I like best!

So, now you know how to create a custom DIY desk for $108, about $1,100 cheaper than the desk I had originally wanted! It is quite the mammoth desk, but I know that I will love having all of the extra space for my supplies/tasks and for organization purposes. :) Now I'm off to start filling my cubes! 


Friday, March 28, 2014

April: favorite {new-to-me} picture books!

Anyone who knows me, knows I am 100% OBSESSED with picture books. Yes, it helps that I am a teacher {and certified literacy specialist} and use them on a daily basis, but I still can't help picking up a few any time I enter a store that sells them. Seriously, it's a problem.

I've been building my classroom library since I first headed to college to start my teaching career! I knew that I wanted to have a large accumulation of books by the time I graduated, and I certainly have done so! I used to spend quite a bit more money on books back then because I thought all of my books needed to be brand spankin' new. I was wrong.

The first time I brought some of my beloved books into my kindergarten student teaching placement, I left with one, and only one, looking like it did when I entered the classroom. At that moment, I realized that books do not HAVE to be brand-new to work fabulously in your classroom. In fact, I've grown to realize that my "well-loved" books have more of a story to tell! When you find little notes written from classroom teachers to students, stamps of kids' names on the inside, and other little gems {like Patricia Polacco's signature in a few Amazon used books I ordered! Score!}, you begin to realize how meaningful the book was to someone before you.

Although I mainly purchase my books {used} on Amazon, I also wander into Goodwill once in awhile to scour the shelves. I recently helped plan our school's first annual Family Literacy Night, and picked up a few {new-to-me} books from the Scholastic Book Fair!

We will start with a fairly simple picture book I recently picked up at my school's Scholastic Book Fair.
Available on Amazon

Z is for Moose by Kelly Bingham and Paul Zelinsky is a wonderful picture book for kiddos learning their ABC's, letter-word association, and for ANYONE looking for a laugh! {Seriously, my husband and I were cracking up at some of the pages.} Zebra is telling the ABC story, and forgets to put Moose in on the 'M' page. You'll have to check this one out to see where Moose ends up in the story!

Another book I picked up at the Scholastic Book Fair was Abe Lincoln's Dream by Lane Smith. I'm a big fan of Lane Smith's illustrations and the way he formats his work with interesting fonts and graphics. This book would be a great historical fiction addition to any classroom! I find that I am drawn to books about Abe Lincoln, {thanks to my friend Ashley + her OBSESSION, most likely!}. 

This is a super-sweet {and funny} book about a little girl on a field trip to the White House that tags along with Abe Lincoln's ghost. Check it out! 

Next up is yet another hilarious picture book by Drew Daywalt and the {fabulous} Oliver Jeffers. If you haven't checked out any of Oliver Jeffers' work yet, you are SERIOUSLY missing out. I am slightly obsessed with his illustrations. Seriously.

The Day the Crayons Quit is receiving mega-praise on Amazon, as well as other teaching blogs and such. I CAN SEE WHY! This book couples voice, word choice, humor, and amazing illustrations all in one. Duncan's crayons each write him a letter telling him why they want to quit, each with their own hilarious reasons. Definitely one of my favorite picture books so far this year.


Sophie gives The Day the Crayons Quit her full-approval! 
Here's a little excerpt to show you what I mean {this page generally gets the most laughs, but doesn't anything with the word underwear?!}...
"Hey Duncan, it's me, PEACH CRAYON. WHY did you peel off my paper wrapping?? Now I'm NAKED and too embarrassed to leave the crayon box. I don't even have any underwear! How would YOU like to go to school naked?"

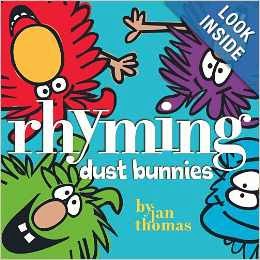
Last, but CERTAINLY not least, is Rhyming Dust Bunnies by Jan Thomas. This book is great for any kiddo learning to rhyme, or even just for kids looking for a hilarious read-aloud {are you noticing a trend with my book-selections?!} This was a great find at my local Goodwill!


In this book, the dust bunnies: Ed, Ned, Ted, & Bob try to RHYME all the TIME! The only problem is, Bob can never seem to get the rhymes quite right. And yes, this is another book that my husband and I were laughing out loud at. {Am I the only one that tortures, I mean, reads, hilarious picture books to my hubs?!}

Here's an excerpt:
"Hello! We are Ed, Ned, Ted ... and Bob. We rhyme all the time!
Hey! What rhymes with car?
Far! Jar! Tar! Look!
No, Bob ... 'LOOK!' does not rhyme with car!"
*Check it out to see why Bob can't seem to get his rhymes down!

Hopefully these are some new titles you haven't heard before! I will try to post some favorite picture books {and novels} monthly, to incorporate as many of my favs as I can! If you have any recommendations, please let me know in the comments below! :)